Strong light matters more than a fancy shelf or a huge number of seed varieties.
Warmth helps seeds sprout, but once they emerge the priority becomes bright light and airflow.
Most seed-starting trouble comes from weak light, overwatering, or starting too early.
Build a simple seed-starting setup you can maintain
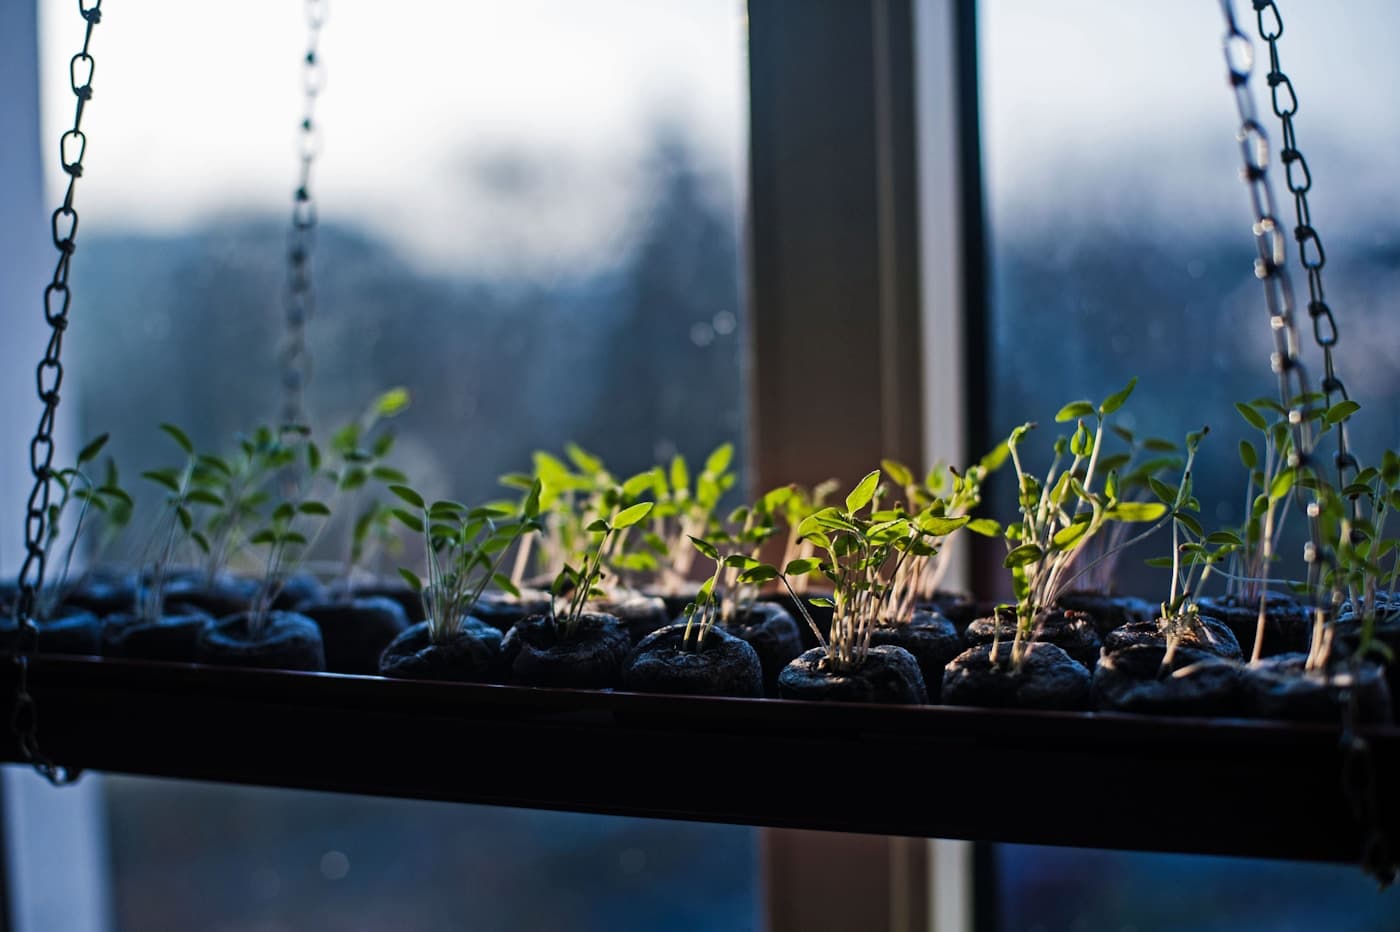
A basic indoor seed-starting station only needs a few pieces: trays or small cells, a sterile seed-starting mix, labels, a way to water gently, and a dependable light source. Fancy systems are optional. The real goal is a setup that keeps seedlings bright, warm at germination, and easy to check every day.
If you are new to seed starting, begin with a short list of crops you actually want to grow and plant outside. Tomatoes, peppers, and many herbs are worth starting indoors. Fast crops that dislike root disturbance are often better direct-sown later, so avoid turning every seed packet into an indoor project.
- Use clean containers and fresh mix to reduce disease pressure.
- Label every sowing at planting time rather than trusting memory.
- Start only the number of plants you realistically have room to light and pot up.
Sow at the right depth and keep germination conditions steady
Fill cells with pre-moistened mix that feels damp but not muddy, then sow each crop at the depth recommended for that seed size. Tiny seeds usually need a light covering, while larger seeds can go deeper. The point is seed-to-mix contact with enough moisture to start the germination process evenly.
Warmth is most important before sprouts appear. Many warm-season vegetables germinate faster with bottom heat or a naturally warm room. As soon as seedlings emerge, remove any humidity dome and shift attention toward light and airflow. Keeping everything sealed and overly damp after sprouting is one of the fastest ways to create weak growth.
- Mist or bottom-water lightly after sowing so seeds do not wash out of place.
- Check trays daily because different crops sprout on different schedules.
- Remove covers promptly once the first seedlings break the surface.
Give seedlings far more light than a windowsill usually provides
Most seedlings become leggy indoors because the light source is too weak or too far away. A sunny window can help, but for strong transplants it is usually not enough by itself. Overhead grow lights placed close to the foliage produce shorter stems, thicker growth, and seedlings that recover faster after transplanting.
Keep lights close as seedlings grow, adjust height frequently, and aim for a long bright day rather than occasional bursts of light. Once plants are up, slightly cooler air and a bit of airflow from a nearby fan can also help them build sturdier stems.
- Raise lights as seedlings grow so leaves do not touch the fixture.
- Run lights on a timer to keep the daily rhythm consistent.
- Use gentle airflow to strengthen stems and reduce stagnant humid air.
Water carefully and feed only when seedlings are ready
Young seedlings die faster from soggy conditions than from slightly dry surfaces. Water when the cells are beginning to lighten and the mix has used some of its moisture, not every time you pass the tray. Bottom-watering can help roots grow downward, but do not leave trays sitting in water longer than necessary.
Seedlings carry enough stored energy to get through germination and the first stage of growth. Once true leaves arrive and roots are actively filling the cell, a mild feeding routine can begin. Strong fertilizer too early only creates stress and salt buildup in a root system that is still tiny.
- Use room-temperature water when possible so roots are not shocked.
- Let excess water drain away instead of trapping cells in standing water.
- Feed lightly after true leaves appear, not at the moment of sprouting.
Pot up and harden off before transplanting outdoors
Seedlings stay healthier when they move up before roots become badly crowded. Potting up gives them fresh mix, more root room, and a chance to keep growing steadily if outdoor conditions are still not ready. Tomatoes especially tolerate potting up well and can be set slightly deeper if stems are long.
Before transplanting outdoors, harden seedlings off over several days so they can adjust to direct sun, wind, and temperature swings. This transition protects all the work you did indoors. Well-grown seedlings still need that final training period before they are ready for the garden.
- Pot up when roots are holding the plug together but not choking the cell.
- Start hardening off in bright shade before introducing full sun.
- Keep watching the local forecast so you do not rush tender starts into a cold snap.
Weak light and overwatering cause more seed-starting failures than bad seed
When seedlings stretch, flop, or collapse, the fix is usually better light and a calmer watering routine, not more heat, more fertilizer, or another tray full of replacements.
- Move lights close enough that seedlings do not have to reach for them.
- Water because the mix needs it, not because the surface looks dry for an hour.
- Start fewer trays if that is what it takes to give every seedling proper light.
Quick answers before you head back outside
These are the questions that usually come up once the guide turns into real garden work.
Do I need a heat mat for indoor seed starting?
Not always, but it helps for warm-season crops such as tomatoes and peppers, especially in a cool room. Once seeds emerge, strong light becomes more important than extra bottom heat.
Can I start seeds on a windowsill only?
You can start some, but most seedlings grown only on a windowsill become weak and lean toward the glass. Supplemental overhead light usually makes the difference between surviving seedlings and transplant-ready ones.
When should I pot seedlings up?
Pot them up after true leaves appear and roots begin filling the cell, before the plant becomes tightly root-bound. Waiting too long makes growth harder to recover later.
How early should I start seeds indoors?
Base it on the crop and your likely outdoor planting window, not on impatience. Starting too early is one of the most common ways beginners create leggy, overgrown seedlings that are difficult to manage.


